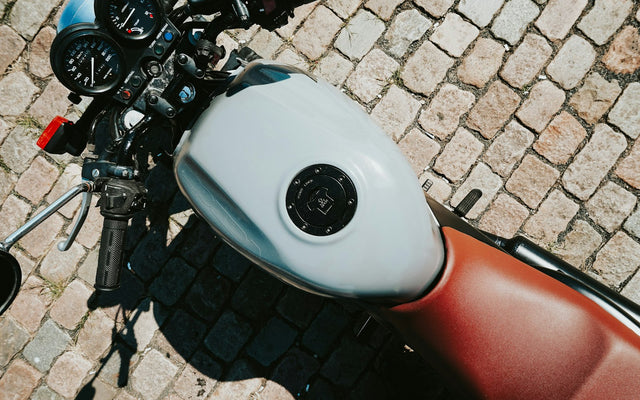
A wrap is the quickest way to change the look of your motorbike, protect the paint from rubbing boots and rucksacks and give it a personal touch without a respray. Motorbike parts are small and come off easily, so it's a very rewarding job to do at home. But they have lots of curves, and that's where the whole secret lies.
How much vinyl you need
| Part | Vinyl (152 cm roll) | Price |
|---|---|---|
| Tank | 75 cm | €34.99 |
| Mudguards and side panels | 50 cm | €25.99 |
| Sports bike fairings | 2 m | €69.99 |
| 125 cc scooter | 1–2 m | €44.99–69.99 |
| Whole motorbike | 2–3 m | €69.99–89.99 |
| Helmet | 50 cm | €25.99 |
As the roll is 152 cm wide, several parts fit into 75 cm of length. Before cutting, lay the parts (or paper templates) on the vinyl to get the most out of it.
Which finish to choose
- Carbon: the motorbike classic. Premium carbon looks like lacquered carbon, and forged carbon is the latest trend on sports bikes.
- Matte: matte black or military green for a custom or scrambler style.
- Gloss and bright colours: gloss colours and ICR® Premium, with shades such as fantastic green.
- To stand out: chromes or colour shift.
Prepare the parts
Whenever you can, take them off: it's easier on a workbench, you can wrap the film round the back of the part and there's no risk of cutting anything else. Wash with soapy water, dry and degrease with isopropyl alcohol. On the tank, remove the filler cap and, if possible, the lock ring.
Work between 15 and 25 °C, out of the sun and away from dust.
The trick for curves
A tank or a tail section curves in two directions at once, and that's where ordinary vinyl creases. Here's how to do it:
- Lay the film taut over the highest part of the piece and squeegee from the centre outwards.
- On the curved areas, heat the vinyl with the heat gun until it softens and stretch it evenly, pulling from both sides at once. Our films are heat-formable: they follow the curve like chewing gum.
- If a crease forms, don't flatten it: lift it, heat it and stretch again in another direction.
- Where the curve is too tight, make a relief cut and overlap by 3 to 5 mm. Hide it along a natural line of the part.
- Finally, heat the edges and press them down: post-heating is what stops the film lifting.
The tank, step by step
Cut a piece with 5 cm of spare on each side. Start on top of the tank, in the middle, and work down towards the sides, heating and stretching. Around the filler cap, make a star-shaped cut and fold the tabs inwards. At the bottom of the tank, wrap the film underneath or trim it flush with the seal using the cutter. Many riders do the tank in carbon and keep the rest in the original colour: a spectacular change that takes an hour.
After wrapping
Wait 48 hours before washing the bike. After that, wash it by hand or with a pressure washer kept well away from the edges, and without solvent-based products. Near the exhaust, leave a few centimetres unwrapped: strong, constant heat damages any adhesive.
All the recommended films are on the motorbike wrap page and, for the tank, on motorbike tank wrap.
Frequently asked questions
How much vinyl do I need for a whole motorbike?
Between 2 and 3 m of 152 cm roll for a whole motorbike. For the tank alone, 75 cm is enough, and for a 125 cc scooter, 1 to 2 m.
Which vinyl is best for the tank?
A heat-formable film, because the tank curves in two directions. All of ours are. The most popular for tanks is carbon, gloss or forged.
Can I wrap a motorbike without taking parts off?
Yes, but the result is better if you take them off: the edges wrap round the back of the part, so they don't show and don't lift.
Does a wrap protect the motorbike paint?
Yes. It protects it from rubbing boots, clothes and rucksacks and from fine scratches, and when you take it off, the original paint is like new.


